Thursday, 3 November 2011

my brainshark


Have you ever come across doing an online presentation using your own slides and your very own voice?? Here is a free tool which is very useful for many people regardless of who they are. Be it a student, a law  practitioner, a marketing executive or anyone else on this earth, I am sure that Brainshark will be the savior of your life in terms of presenting your ideas to the whole world.


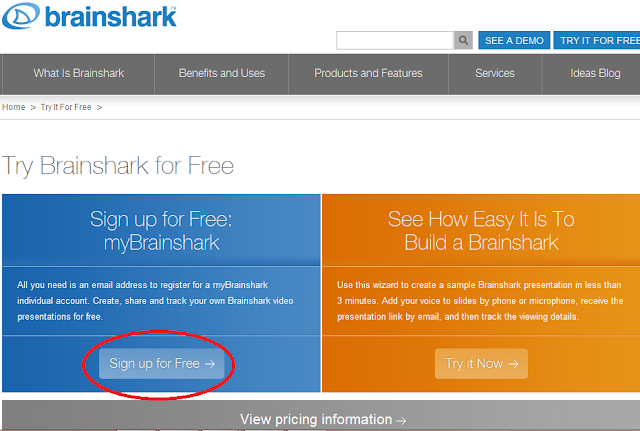
Looking from the classroom point of view, Brainshark is certainly a new invention and a breakthrough which benefits both teacher and learners. This website provides a medium to promote writing, speaking, and listening skill among the learners. The only thing that need to be done before engaging to this tool is that you have to sign up for the my brainshark account. Once you are a registered member, please make sure what kind of presentation file would you like to upload. The example is as below:


Notice the Great Uses for myBrainshark column on the right side of the picture. Basically this website allows you to upload a powerpoint file, to narrate particular document of your choice, to upload useful video to scaffold your presentation, to create your own photo album as well as to produce a podcast file. However, among these five choices, I would only like to show you on how to upload a simple powerpoint file, add some voice recording for each slide along with some background music in the presentation.


Once you have uploaded the file, there are many other things which can be done. As you can see in the above picture,there are two main columns available. The first one is the Things you can do and the other one is the three sub columns which contain presentation properties, security and options. If you wanna manage the audio section, just click on the manage audio, with sub links;record audio and background audio.

In order to record an audio for each slide, you are required to have an Adobe Flash Player Settings so that your camera and microphone can have access to the brainshark tool. If a small pop up like in the red circle appear, just allow the access so that the recording can take place.


The good thing about this tool is that it does not only allow you to use your microphone but it also gives you a number to be dialed so that you can record your voice by phone. Ain't this amazing? Before recording the audio just please make sure that you type in your presentation code as well. This might make your life easier and simpler and I believe that brainshark also helps a lot particularly in the speaking skill development.

Why this tool is beneficial in the language learning classroom?
1. It provides a medium for learners to get used to way of presenting ideas through an interesting tool. 
2.This tool allows learners to create their own slide presentation and use their own voice to explain each slides with the needed details and explanation.
3.Encourage speaking skill development among second language learners, build their confidence and allow them to make some changes and modifications especially to their voice presentation.
4.Brainshark provides an environment with low affective filter which means less anxiety, self-doubt and mere boredome among the learner. This may encourage them to produce a better outcome especially in acquiring and learning a second language 
5. Since this coolest tool sparks a vital interest, provides a low anxiety environments, it also bolsters the learner's self esteem.
6. It makes life easier for learners and teacher in terms of preparing the slides as well as assessing the presentation. Learners can always prepare for the task at home within the time allocated, and especially when the task is regarded as a homework. On the other hand, the teacher can also assess the presentation once the learner send the completed task assigned through email. In other words, myBrainshark is definitely making life easier and accessible.


The drawbacks which can be found are:
1. It needs a very good internet connection especially in the school or even at home where learners are expected to be able to upload the file and record the oral presentation.
2. This tool might be useless if any of the teacher or the learner cant have access to the internet.
3. The speaking activity might be done consciously,in which make the learner aware of their language use. If this happen, the teacher will not be able to find the real language problems among the learners as they might just read through a planned written text provided by them.
4. Just like another tools in this blog, this one is also free of charge. All you need to do is just sign up for your own account and everything is under your control.

http://www.brainshark.com/mybrainshark

wallwisher


Dreaming of having an interactive wall for discussion with your students/colleagues/mates/friends etc?
wallwisher.com is THE ONE that you're looking for!


This amazing interactive white board or wall is designed for open brainstorming, discussion or even thoughts sharing among a group of people. The only main thing which is needed is the builder of the wall,whose account should be signed up to the wallwisher account. During general use in a language learning classroom, the teacher must sign up in order to be the builder of the wall. Once you have signed up for the wallwisher account, you can simply create the topic of the day. Say for an example above, the information about the wall builder can be found at the upper right of the wall. The group members do not have to sign up in order to post their opinions on the wall but they can just type in the url which has been set up by the wall builder. For example in this discussion the topic of the wall is about bubblr therefore the URL of the wall is 


The good things about this tool:
1. Learners can freely express their thoughts and ideas by directly post the notes on the wall. Since this is a public wall (they must know the exact url in order to join the discussion set up by the builder of the wall), all of the invited members are able to see and respond to any of the sticky notes.Usually the notes are presented in bubbles which allow you to put in your name, add image, audio or video link.
2. Students can also enhance their language use by expressing their opinions in the target language.
3. Fun, funky and acts as an interactive way of learning. Students might be interested to join the discussion as it provides various choice of colours, movable bubbles, as well as the delete or undo button in case they need to remove or make some changes to their bubbles.

However, the downsides might be:
1. Too little too explain since the bubble only allow 160 characters in one bubble.
2. This tool does not really encourage proper use of language since learners might only go for short forms or even simpler sentence to meet to word limit of the bubble.
3. The wall might become too crowded if there're too many bubbles being posted on the wall. This might distract learners' focus and might overlook the most important and relevant ideas.
4. Only compatible images, audio and video links can be posted on the wall.This may demotivate some learners if they cant post the link that they prefer.

bookr


http://www.pimpampum.net/bookr/

Hi all, this is another amazing tool for students to be creative in expressing their creativity while experimenting a new language. This pimpampum bookr is actually a tool in which allows learners to create and share their own photobook using Flickr photos. This tool is specifically designed for users to pick their own selection of pictures by typing in the tag box: for example if the learners wanna present about "The most beautiful place that I have ever been to", they might just need to type in the name of the place in the tag box and within seconds, those related pictures to the keyword will appear in the stripe below the main frame.


As you can see in the above picture, learners can start searching for images related to the given topic by typing in the keyword in the tag box, and after that you can just press the GO button. In order to begin creating a bookr, you are expected to find a suitable title or topic for your photobook,and yeah dont forget to put your name as the author as well. Its up to you whether you wanna use your real name or just your nickname, as long as people can have a look at it and be amazed of your masterpiece.


In my classroom, I have decided to present about the most beautiful place that I have ever been to and that place is Paris,France. As in the picture, I have typed in The City of Romance as the main title for my bookr and Kayla as the name of the author.  I have also selected a background image which portrays the central attraction of Paris which is the Eiffel Tower. Choosing the image is quite easy peasy lemon squeezy because you can just simply drag the picture to the photobook and it will just stay there.

The same draggy system is also applied to all of your slides in your photobook. You can simply drag the chosen image right into either right of left page of the bookr. As simple as that and you are now capable of presenting an attractive bookr with interesting images and explanations as well. As for the explanation part, you can write down a simple but precise explanation about the picture in the box provided below each of the pictures.

The pros of this tool:
1. This tool can definitely be a perfect platform for learners to combine the beauty of arts (images) and the use of language especially for the explanation section.
2. This tool also allows  learners to be familiar with descriptive sort of sentences while describing each of the picture in their photobook.
3. I would recommend most teachers to use this tool with students in the classroom as most of them are born with multiple intelligence, in which may related to VAK, visual, audio, and kinesthetic intelligence. In this case, learners with visual intelligence are totally at advantage since they can actually express their thoughts with the presence of beautiful images from Flickr.
4. Teachers can always manipulate this Bookr to be a medium for students to have an oral presentation scaffolded by the images and a few short explanation below each pictures. In the first place, Bookr may just be funky medium for learners to find pictures and simply describe them but if they need to stand on front of the class to present their photobook, this will absolutely boost learners' speaking confidence.
5. Since this activity should involve only individual effort to create a photobook, an autonomous way of learning can be developed in the classroom, hence learners can become an independent learner.
6. Free access, without having to sign up for the website is totally amazing for both teacher and learners.


The cons maybe:
1. Bookr only allows a limited number of words to be typed in the explanation box while learners need to specifically describe each picture unless the teacher can allocate some times for them to present their photobook orally.
2. While dealing with this tool, learners are expected to work individually therefore the teacher may not be able to monitor each of students' progression. This may lead them to be carried away with the task as they might also look for inappropriate images from the internet.
3. Be careful while creating the photobook as for some unexplained technical reasons, your photobook may disappear just like that! Once you have finished editing, be sure to click on the publish button so that your masterpiece can simply be accessed by other net users.


kayla. Powered by Blogger.

.